You must update to 0.3.28 or later BEFORE starting the card swap. You can follow the SEPIA update guide here.
Physical Removal
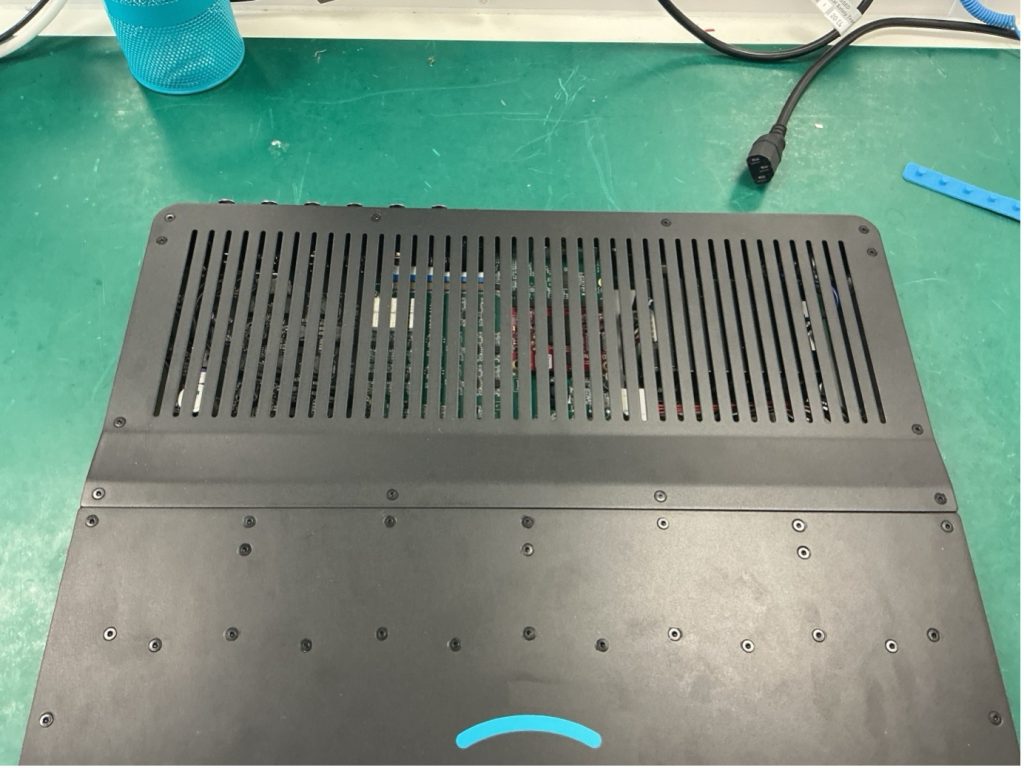
Step 1. Ensure the unit is powered off. Unscrew the back lid. Notice that the front 2 screws are shorter. These should be stored separately.
Step 2. Unscrew the locking nuts (5.5 nut driver needed). If the nut spins around continually with out loosening, you may need to tighten up the standoff (this is done underneath the unit with a 2.0 hex driver).
Step 3. Unscrew the option card plate at the back of the unit. There are 4 black M2.5 in the corners.
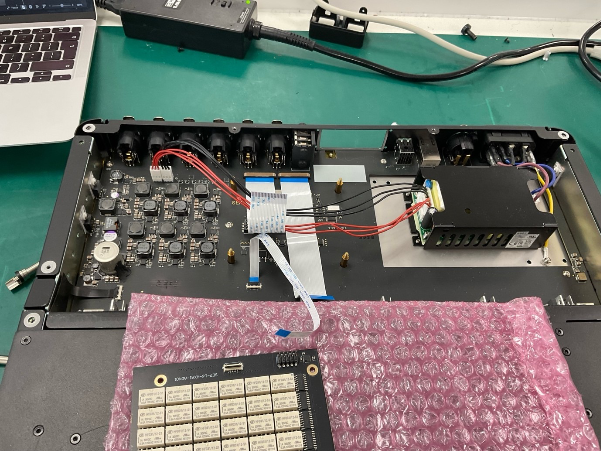
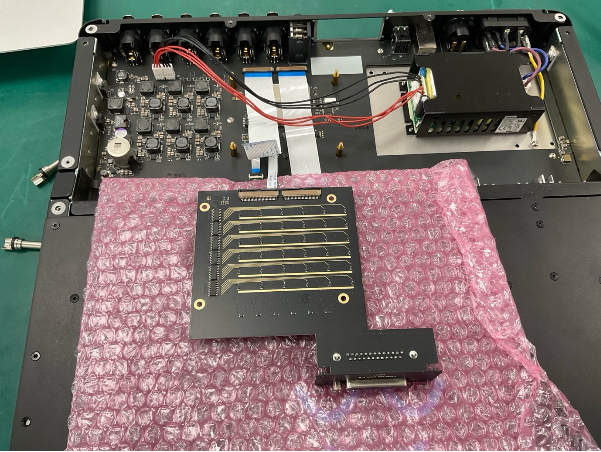
Step 4. Place an anti-static/insulating material on the front lid and place the analog option card on top.
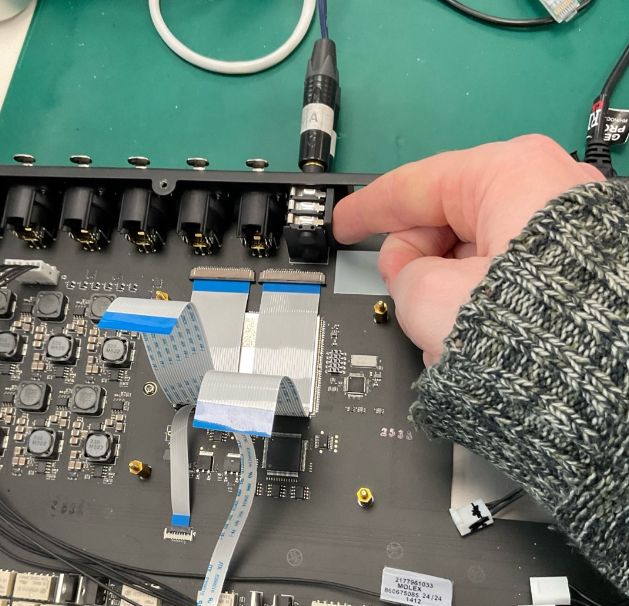
Step 5. Remove all the ribbon cables. A Spudger may help.
Step 6. Unplug the power cables and bundle them in front of the power supply.
Step 7.(This step is for units with serial numbers beginning with “L6-LW…” only.) Plug 2 TRS Jacks into the sockets to open the connector gates. Then insert the grey plastic jig in place.
Part 2: Physically installing the Dante card
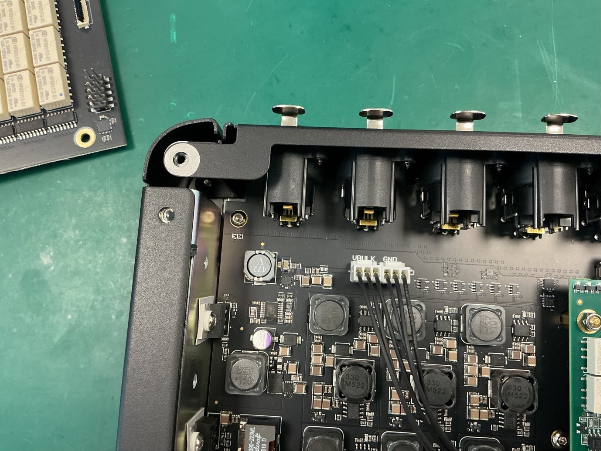
Step 1. Plug in the 2 black power cables, and neatly dress them.
You may want to note the polarity of the cables by marking one of them. The polarity is marked on the main board and dante card.
From the power supply, Red means VDD and Black means GND
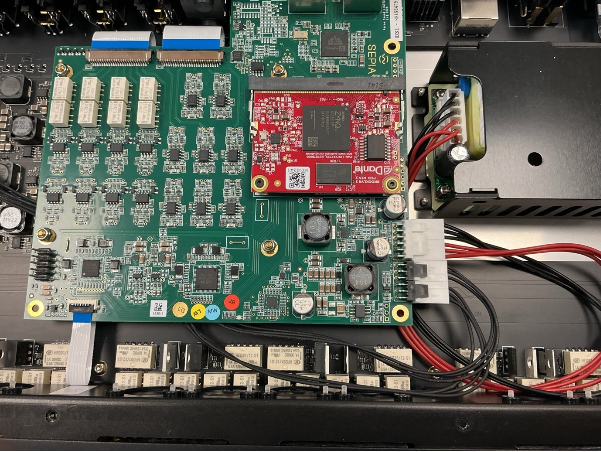
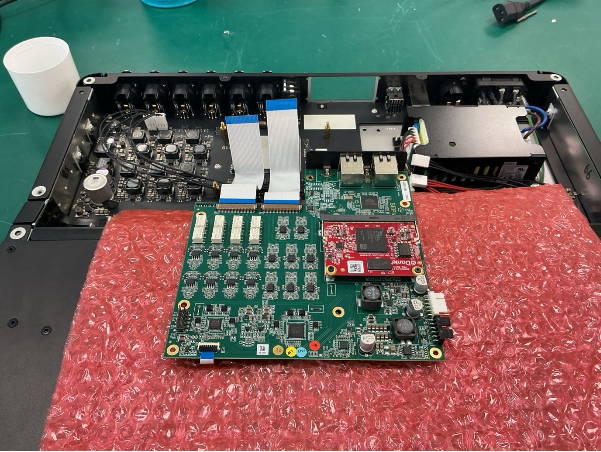
Step 2. Place the dante card on the front lid under some insulation. Plug the dante card ribbons into the main board
Step 3. Slot the Dante card into the unit. Insuring no power cables are snagged under the standoffs
Step 4. Plug the power cables into the the card
Step 5. Again, insuring no power cabbles are pinched under the standoffs, screw the locking nuts in place.
Step 6. Screw the option card plate into the back of the unit
Step 7. Power the unit on and check for shorts. If all LEDs turn on and after 45 seconds you can hear relays click, this means the unit is powering on correctly. If not, double check that no power cables are pinched under the Dante card or that the polarity is the wrong way round.
Step 8. Screw the lid on
Part 3: IT setup
Step 0. The sepia unit must be on software version 0.3.28 BEFORE the card is swapped. If you have installed the new card and are on a version earlier than 0.3.28, you will need to re-install the old card before updating.
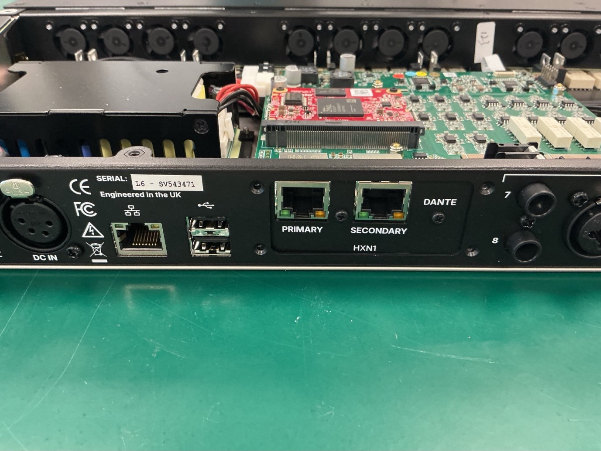
Step 1. Obtain the IP address of the unit. This is the same procedure as the firmware update.
Step 2. (OPTIONAL) We will check which ouput card the host is currently configured to. Launch the terminal and run the following command:
curl -X GET http://IPADDRESS:59282/output-card
(Substituting “IPADDRESS” for your host’s IP address.)
For example:
curl -X GET http://10.10.10.10:59282/output-card
It should return either “HXA1” Or “HXN1”
ID code
Option card
HXA1
Analogue Card
HXN1
Dante Card
Step 3. We will configure the host to our desired option card. In the terminal run:
curl -X PUT http://IPADDRESS:59282/output-card -d OPTIONCARD
(Substituting “IPADDRESS” for your host’s IP address. And Substituting “OPTIONCARD” for the ID code of your newly installed Option card)
For example:
curl -X PUT http://10.10.10.10:59282/output-card -d HXN1
Enter the command and the power cycle the host
Step 4. (optional) You can run the command from step 2 to double check the host was configured correctly.
Step 5. Check Dante updater for any new Dante card software versions.
Privacy & Cookies
We respect your privacy. We only collect and use your IP address for currency conversion when using our Shopify integration. This helps us provide the right currency based on your location. We don’t share this data and only keep it for as long as necessary. For our full statement Click Here


")