SEPIA Quick Start Guide

Table of Contents

Connect the L6 Host

Plug in IEC power cord and switch on. Wait ~1 min for the system to initialise, you will hear multiple relay clicks.

Network Setup


Connect host via Ethernet (Cat5) to your network or computer. This will enable SEPIA to be controlled over the network.
Launch SEPIA Client/Plugin on your device, the L6 Host will appear in the Setup tab.


 Note: Hosts with Dante option cards have a separate network port for Dante.

1 Network Setup

Insert Modules

(if Modules are not already in the host)

Push module firmly into slot until both buttons latch flush. Module appears in Library tab within ~20 seconds.

2 Insert Modules

Creating Paths

Drag and drop modules into Creator Icon Creator for automatic path setup.

3 Creating Paths

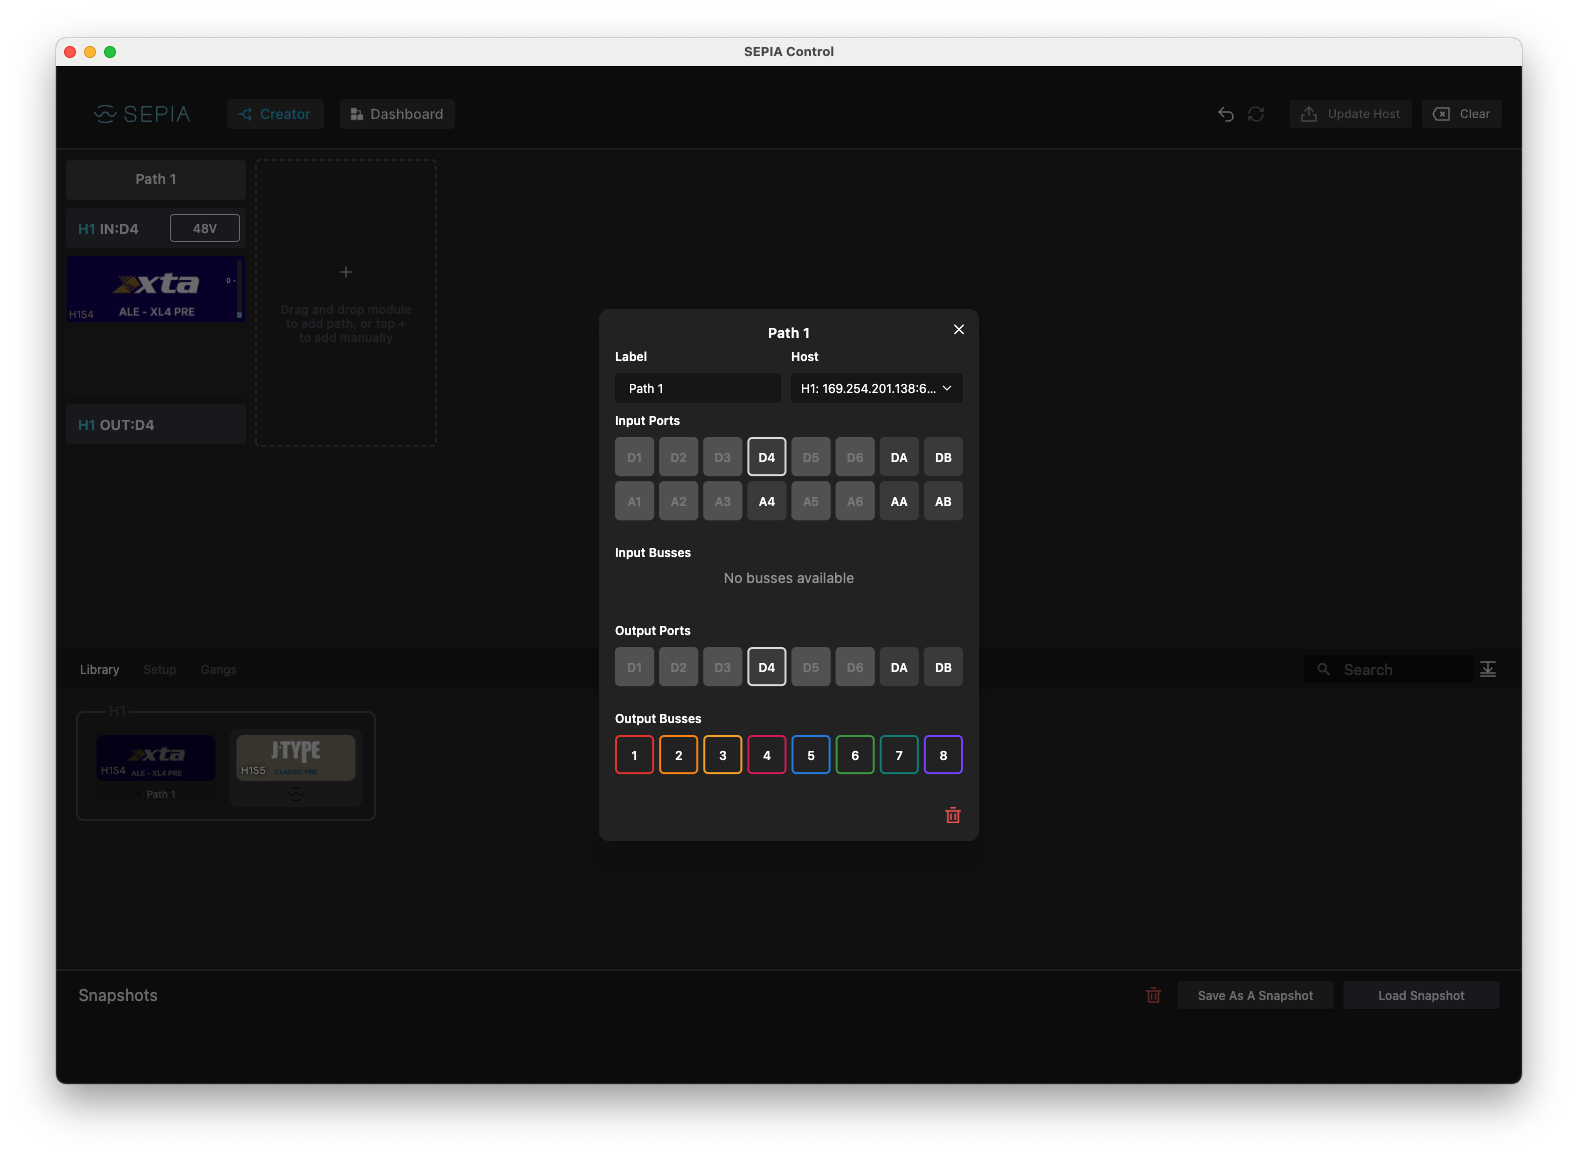
If necessary, change source/destination by clicking path label.

Once routing changes are made, the UpdateHostButton button will be highlighted in blue, click to apply your changes.

4 Creating Paths 2
fcb651caa55b6124e575fe425eb36e8167de0d90

Note: For hosts with the Analogue option card, insure the path input matches the slot number. For example, a module in slot 2 can only use input 2. (Except for Auxiliary inputs)

Note: For hosts with the Dante Card, insure BOTH the path input AND the path output matches the module slot number. For example, a module in slot 2 can only use input 2 (either xlr or dante) and output 2. (Except for Auxiliary inputs)

Note: When a Dante input is being used, you must disconnect any XLRs from the corresponding analogue input.

Available I/O

  • 6 XLR inputs (these go directly to slots 1-6 and cannot be altered)
  • 2 Assignable TRS Jack Aux inputs
  • L6-A1 Analog option card: 8 Assignable analog outputs
  • L6-N1 Dante option card: 6 digital inputs and outputs (these go directly to/from slots 1-6 and cannot be altered) & 2 assignable digital aux inputs & outputs
  • Multiple internal busses
5 Creating Paths Availableio 1
6 Creating Paths Availableio 2

dashboard view icon Dashboard View

  • Allows you to control the whole chain
  • Global metering
  • Reorder chains by dragging drag icon without changing routing
  • Selectable density dashboard view size icon on the top right
  • Focus on specific paths by expanding them with anchor direction icon
7 Creating Paths Dashboard View

Adjusting Module Settings

Access settings via the path on dashboard view icon Dashboard or by clicking the module in Creator Icon Creator.

Modules must be in a path to pass audio.

Module controls are live but always click UpdateHostButton after routing changes.

8 Adjusting Module Settings 1
9 Adjusting Module Settings 2

Saving & Recalling Setups (Snapshots)

Save by clicking save as a shanpshot icon , recall by clicking snapshot name.

Load previous snapshots by pressing load snapshot icon .

Snapshots require the same modules to be present in Library to work.

10 Saving Recalling

Creating Gangs

Allows you to link identical modules via Gang tab.

11 Creating Gangs

SEPIA does not require a client software/controller or a network connection to pass audio, only to make changes.

When rebooting the SEPIA system, it will recall the last settings if modules have not changed. This recall takes ~30 secs after the boot sequence.

Privacy & Cookies

We respect your privacy. We only collect and use your IP address for currency conversion when using our Shopify integration. This helps us provide the right currency based on your location. We don’t share this data and only keep it for as long as necessary. For our full statement Click Here